
is pressed into position, maintain the pressure until the
five main well and economizer body screws have been
started in their holes and a check is made on the
alignment of the diaphragm and spacer gasket. Do not
tighten the screws, but turn them in as far as possible
without compressing the lockwashers. Release the pump
rod sleeve. This will allow the pump return spring to
expand, stretching the accelerating pump diaphragm to
insure full travel when the accelerating pump is
operated. Then tighten the five main well and
economizer body screws.
(14) Insert the three economizer body cover screws
and lockwashers in the economizer body cover. Place the
new economizer diaphragm and stem assembly and the
economizer body gasket over the screws. Insert the
assembly into its position in the main body, taking care
the alignment of the vacuum passage hole is not
disturbed, then tighten the screws.
(15) If the fuel inlet needle assembly has been
received unassembled, it is to be assembled as follows.
Fit the new fuel inlet needle spring over the
fuel inlet needle pin and insert those parts into
the new fuel inlet needle.
In-
stall the new wire fuel valve clip
in the groove in the fuel inlet
needle.
(16) Set the fuel inlet needle
on the float lever tab, placing the
fuel valve clip under the tab to
hold the needle in place. Guide
the fuel inlet needle into the new
fuel inlet needle seat, positioning
the pivot of the float lever be-
tween the float lever bracket arms
on the fuel inlet needle seat.
Install the new float shaft and
new float shaft retainer.
Figure 35. Fuel Inlet
Needle Assembly
er screw which protrudes into the fuel bowl. Ease the
float and fuel inlet valve assembly into position and
secure it in place by tightening the fuel inlet seat
retainer screw, using Snap-On Tool No. MC12_8.
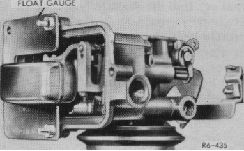
(18) At this point the float setting should be
checked and necessary adjustments made. Invert the
main body assembly, allowing the float to drop to the
closed position. Using Snap-On Tool No. MC-164,
gauge the float, checking the setting on both the
"touch" and "no touch" legs of the gauge. The level
of the float may be adjusted by bending the small tab
in the float lever which contacts the head of the fuel
inlet needle pin. Use needle-nosed pliers for this
correction and recheck the float setting after
adjustments have been made.
(19) Fit the new fuel bowl gasket into the recess
in the rim of the fuel bowl in the main body. Place
the new clamp ring gasket and clamp ring on the fuel
bowl and set the fuel bowl in position on the main
body. Install the four clamp ring retainers, screws,
and lockwashers. Tighten the screws alternately, a
half a turn at a time, until the lockwashers are
compressed. The screws must be tightened
alternately and not drawn too tightly to prevent
setting up stresses that may result in a cracked fuel
bowl.
Figure 36. Setting Float
CAUTION
Fuel inlet needles and seats are matched
assemblies, factory tested to insure proper
operation, and their component parts are not
interchangeable.
(17) Place the new fuel inlet seat retainer screw
gasket on the new fuel inlet seat retainer screw and insert
the screw in the fuel inlet fitting boss on the main body.
Place the new fuel inlet seat gasket on the end of the fuel
inlet seat retain
NOT
The procedure for installing the plastic fuel
bowls containing the adjustable jet is the
same as described above except the main
body is to be held in the inverted position so
the float is in its fully closed position and
clear of the main jet. Install the fuel bowl
with the adjusting needle backed out to the
open position, taking care not to damage the
tip of the needle when the bowl is set in
place.
(20) Install the dashpot assembly on carburetors
so equipped.
